Program Software on your FPGA
⚠️ This documentation is incomplete!
Since Quartus 19 you will need to install WSL on your system to use the NIOS tools. Please follow the steps here.
Watch this tutorial to see how to add a processor to your FPGA design and program it like an Arduino:
Introduction
It is possible to design a processor with the logic elements of the FPGA. This is for Intel a NIOS II soft core processor. After loading the processor on the FPGA, you can program it with the NIOS II Software Build Tools for Eclipse (Tools/Program NIOS II). The processor can be used like a 32-Bit microcontroller, but you can configure it according to your needs. Just add more I/Os' or another SPI interface if you need them! Of course you can still use the left over logic elements and RAM together with the processor to combine FPGA and microcontroller.
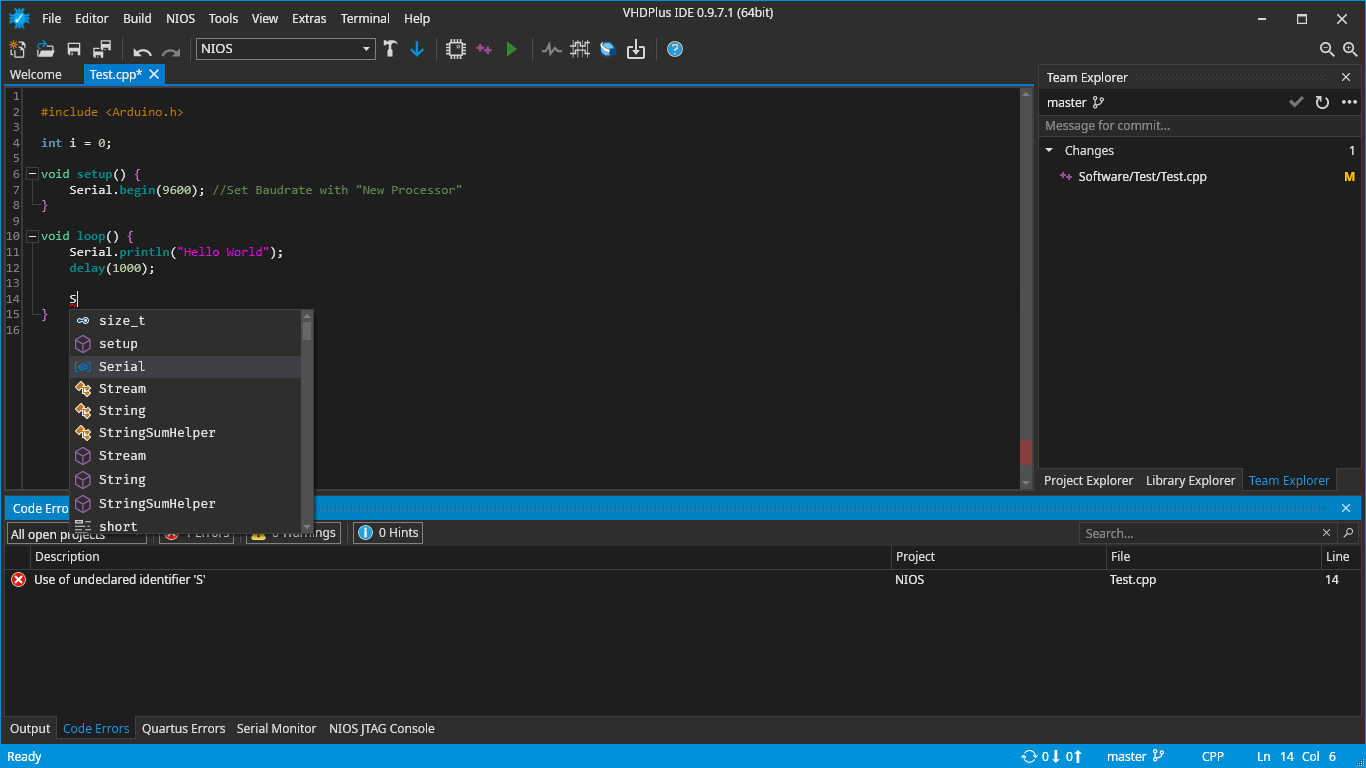
Because this processor can be programmed with c++, people made the Arduino libraries compatible with the NIOS II processor. Check out the NIOSDuino project on GitHub for more information: NIOSDuino
The VHDPlus IDE features first class C++ support so you don't need to use any external tools.
The VHDPlus IDE has 3 important shortcuts to use NIOS in the toolbar.
![]()
- Adding a NIOS II Processor to your project
- Adding a software project
- Compiling and Downloading the software in one go
Setup for Quartus 19 or newer (needed for Windows only)
These steps are provided by Intel (source).
⚠️ WSL 2.0 is not supported!
Install Ubuntu 18.04 in the Windows 10 Store

Open Ubuntu 18.04 and enter a username and password.
Once Ubuntu WSL is running, copy & paste or enter the following commands
sudo apt update; \
sudo apt install wsl; \
sudo apt install dos2unix; \
sudo apt install make;
Activate WSL NIOS in the VHDPlus IDE Settings

Done! You should be able to use NIOS with Quartus now!
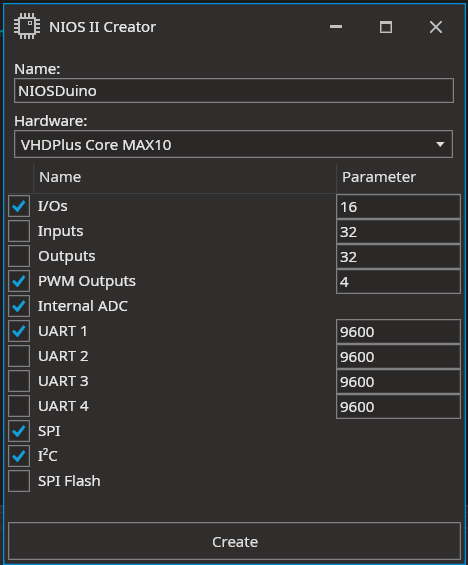
Adding a NIOS II processor to your project
⚠️ Make sure to not have any spaces in your project path to avoid problems with GNU Make.
The VHDPlus IDE makes it easy to add a NIOS II processor to your project.
Simply open the NIOS II Creator at NIOS -> New -> Processor and configure the processor to your needs.
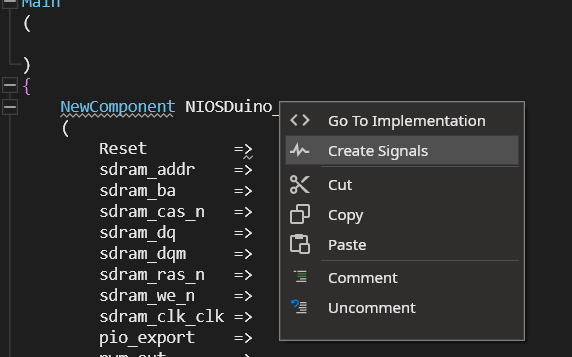
After that you can add the processor to your project by simply adding the component to your main vhdp file.

Next you can use the IDE to create the needed signals for you.
If you are done, you can compile your project.
All needed Signals are connected automatically. Now you can connect optional signals, for example I/Os to use from your software project.
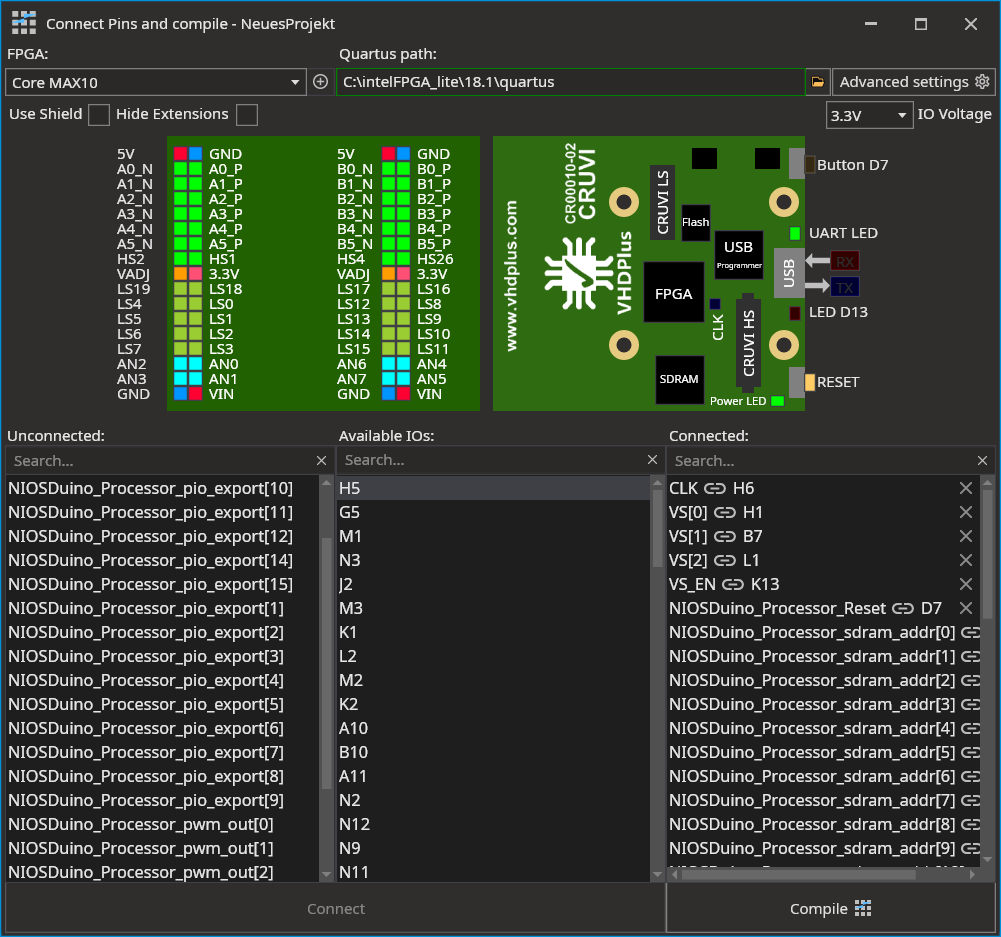 If you are done connecting signals, just click on compile.
This will generate a .sopcinfo file in your project folder that will be needed to create a software project. Download the design to your FPGA to be able to use software.
Using software
Creating a Software project
- Open the Software Creator at
NIOS->New->Softwareand choose a name for your software. - Select the
.sopcinfofile you want to use for your software. If you only have one, you can leave this on default. - Check
Include NIOSDuinoif you want to allow Arduino like programming. - Click on create and wait for the IDE to initialize the project
Downloading software to your FPGA
- If your project is configured correctly, you can simply click on the green arrow to compile and download your software to your FPGA
Using the NIOS II JTAG Monitor
The NIOS II JTAG Monitor allows you to communicate with your FPGA over JTAG.
If you want to test the Hello World application you will need to use this.
You can find it in the menu at NIOS -> NIOS II JTAG Monitor
Debugging
Since VHDPlus IDE 0.9.9.8 NIOS II Debugging is possible! A detailed guide will arrive soon.